A favicon is the small icon that appears in the browser tab next to your website’s title. It is a small but powerful part of your branding. In this guide, you’ll learn step by step how to set up a favicon in WordPress and why it’s important to use one.
Why use a favicon?
A favicon is more than just a visual element. Here are a few reasons why it’s essential:
- Recognizability: It makes your website easier to recognize in a list of open tabs.
- Professional appearance: A favicon shows that you pay attention to details, which makes a good impression on visitors.
- Brand Identity: It strengthens your branding by creating a consistent visual identity.
- Better user experience: It helps users find your site more quickly when they have multiple tabs open.
Ensure you have a suitable favicon file
Before you begin, you’ll need an image to serve as a favicon. Keep the following specifications in mind:
- Dimensions: minimum 512×512 pixels.
- File format: .png, .jpeg, or .ico (PNG is often recommended).
- Tip: Use a free online tool like favicon.io to create or convert a favicon.
Steps to set up a favicon in WordPress
- Log in to your WordPress dashboard and go to Appearance > Customizer.
- In the Customizer, click on Site Identity.
- Scroll down to the Site Icon section and click Select Image.
- If your image has already been uploaded, select it from the media library. If your image hasn’t been uploaded yet, click Upload Files and select the file from your computer.
- Once you’ve selected the image, click “Crop Image” (if necessary) or save it directly.
- Publish your changes => Click Publish in the Customizer to go live with your favicon. You should now see it in your browser tabs.
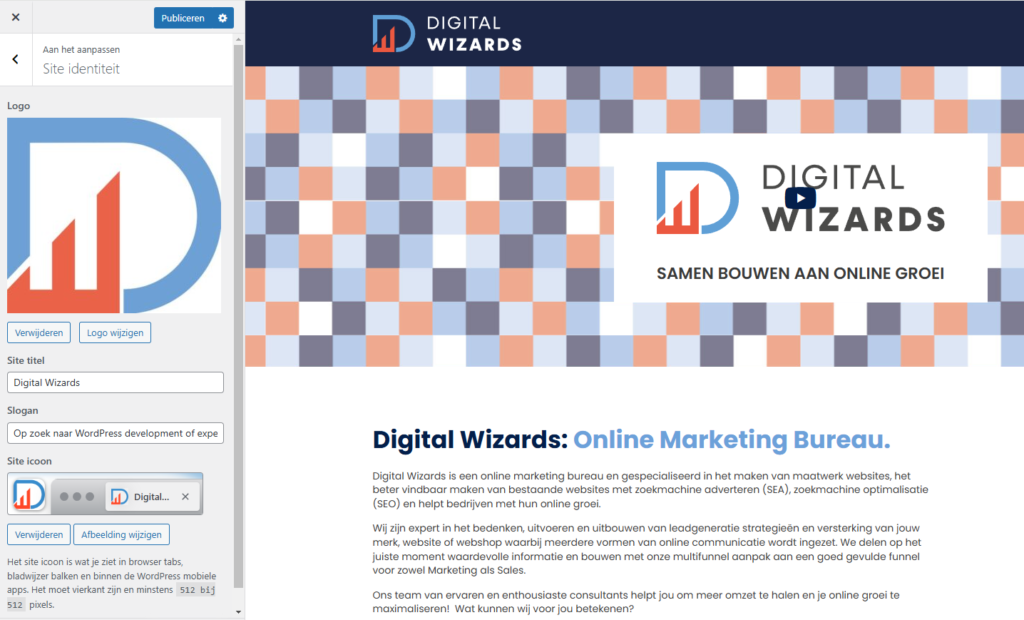
Summary of a favicon in WordPress
Setting up a favicon in WordPress is simple and helps make your website more recognizable. Follow the steps above to give your website a professional look. Don’t forget that a favicon is an important part of your brand identity and user experience. Good luck!